
How to Create Invoices in the Stripe Dashboard
In This Document
Whether you’re using WP Simple Pay or not, you can create individual one-time or recurring invoices in your Stripe Dashboard to send to your clients and customers. These invoices are hosted entirely on Stripe’s servers.
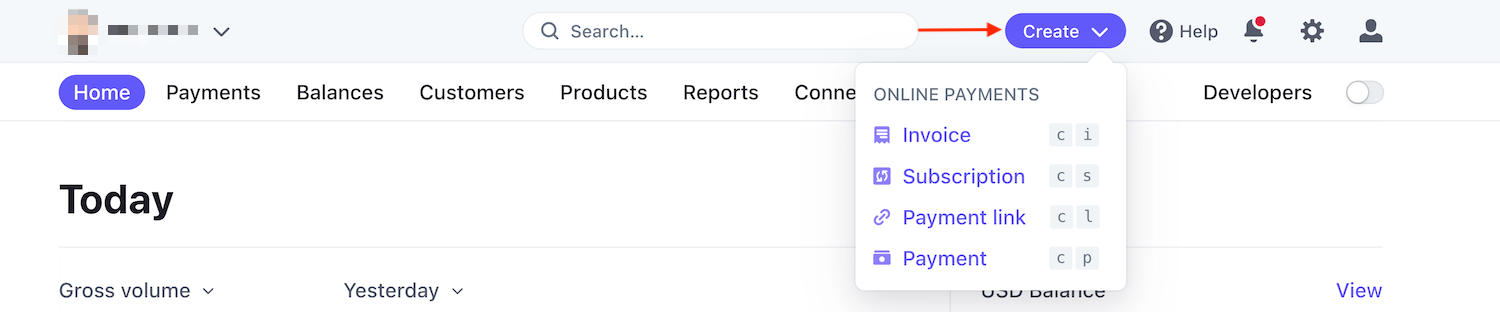
To create and view invoices in your Stripe Dashboard, go to Create → Invoice in the upper right corner of the screen.
Create a New Invoice
- Navigate to the Create an invoice page.
- Select an existing customer from the dropdown or
- Select + Add new customer and fill out the Name and Email fields.
- Click Add customer.
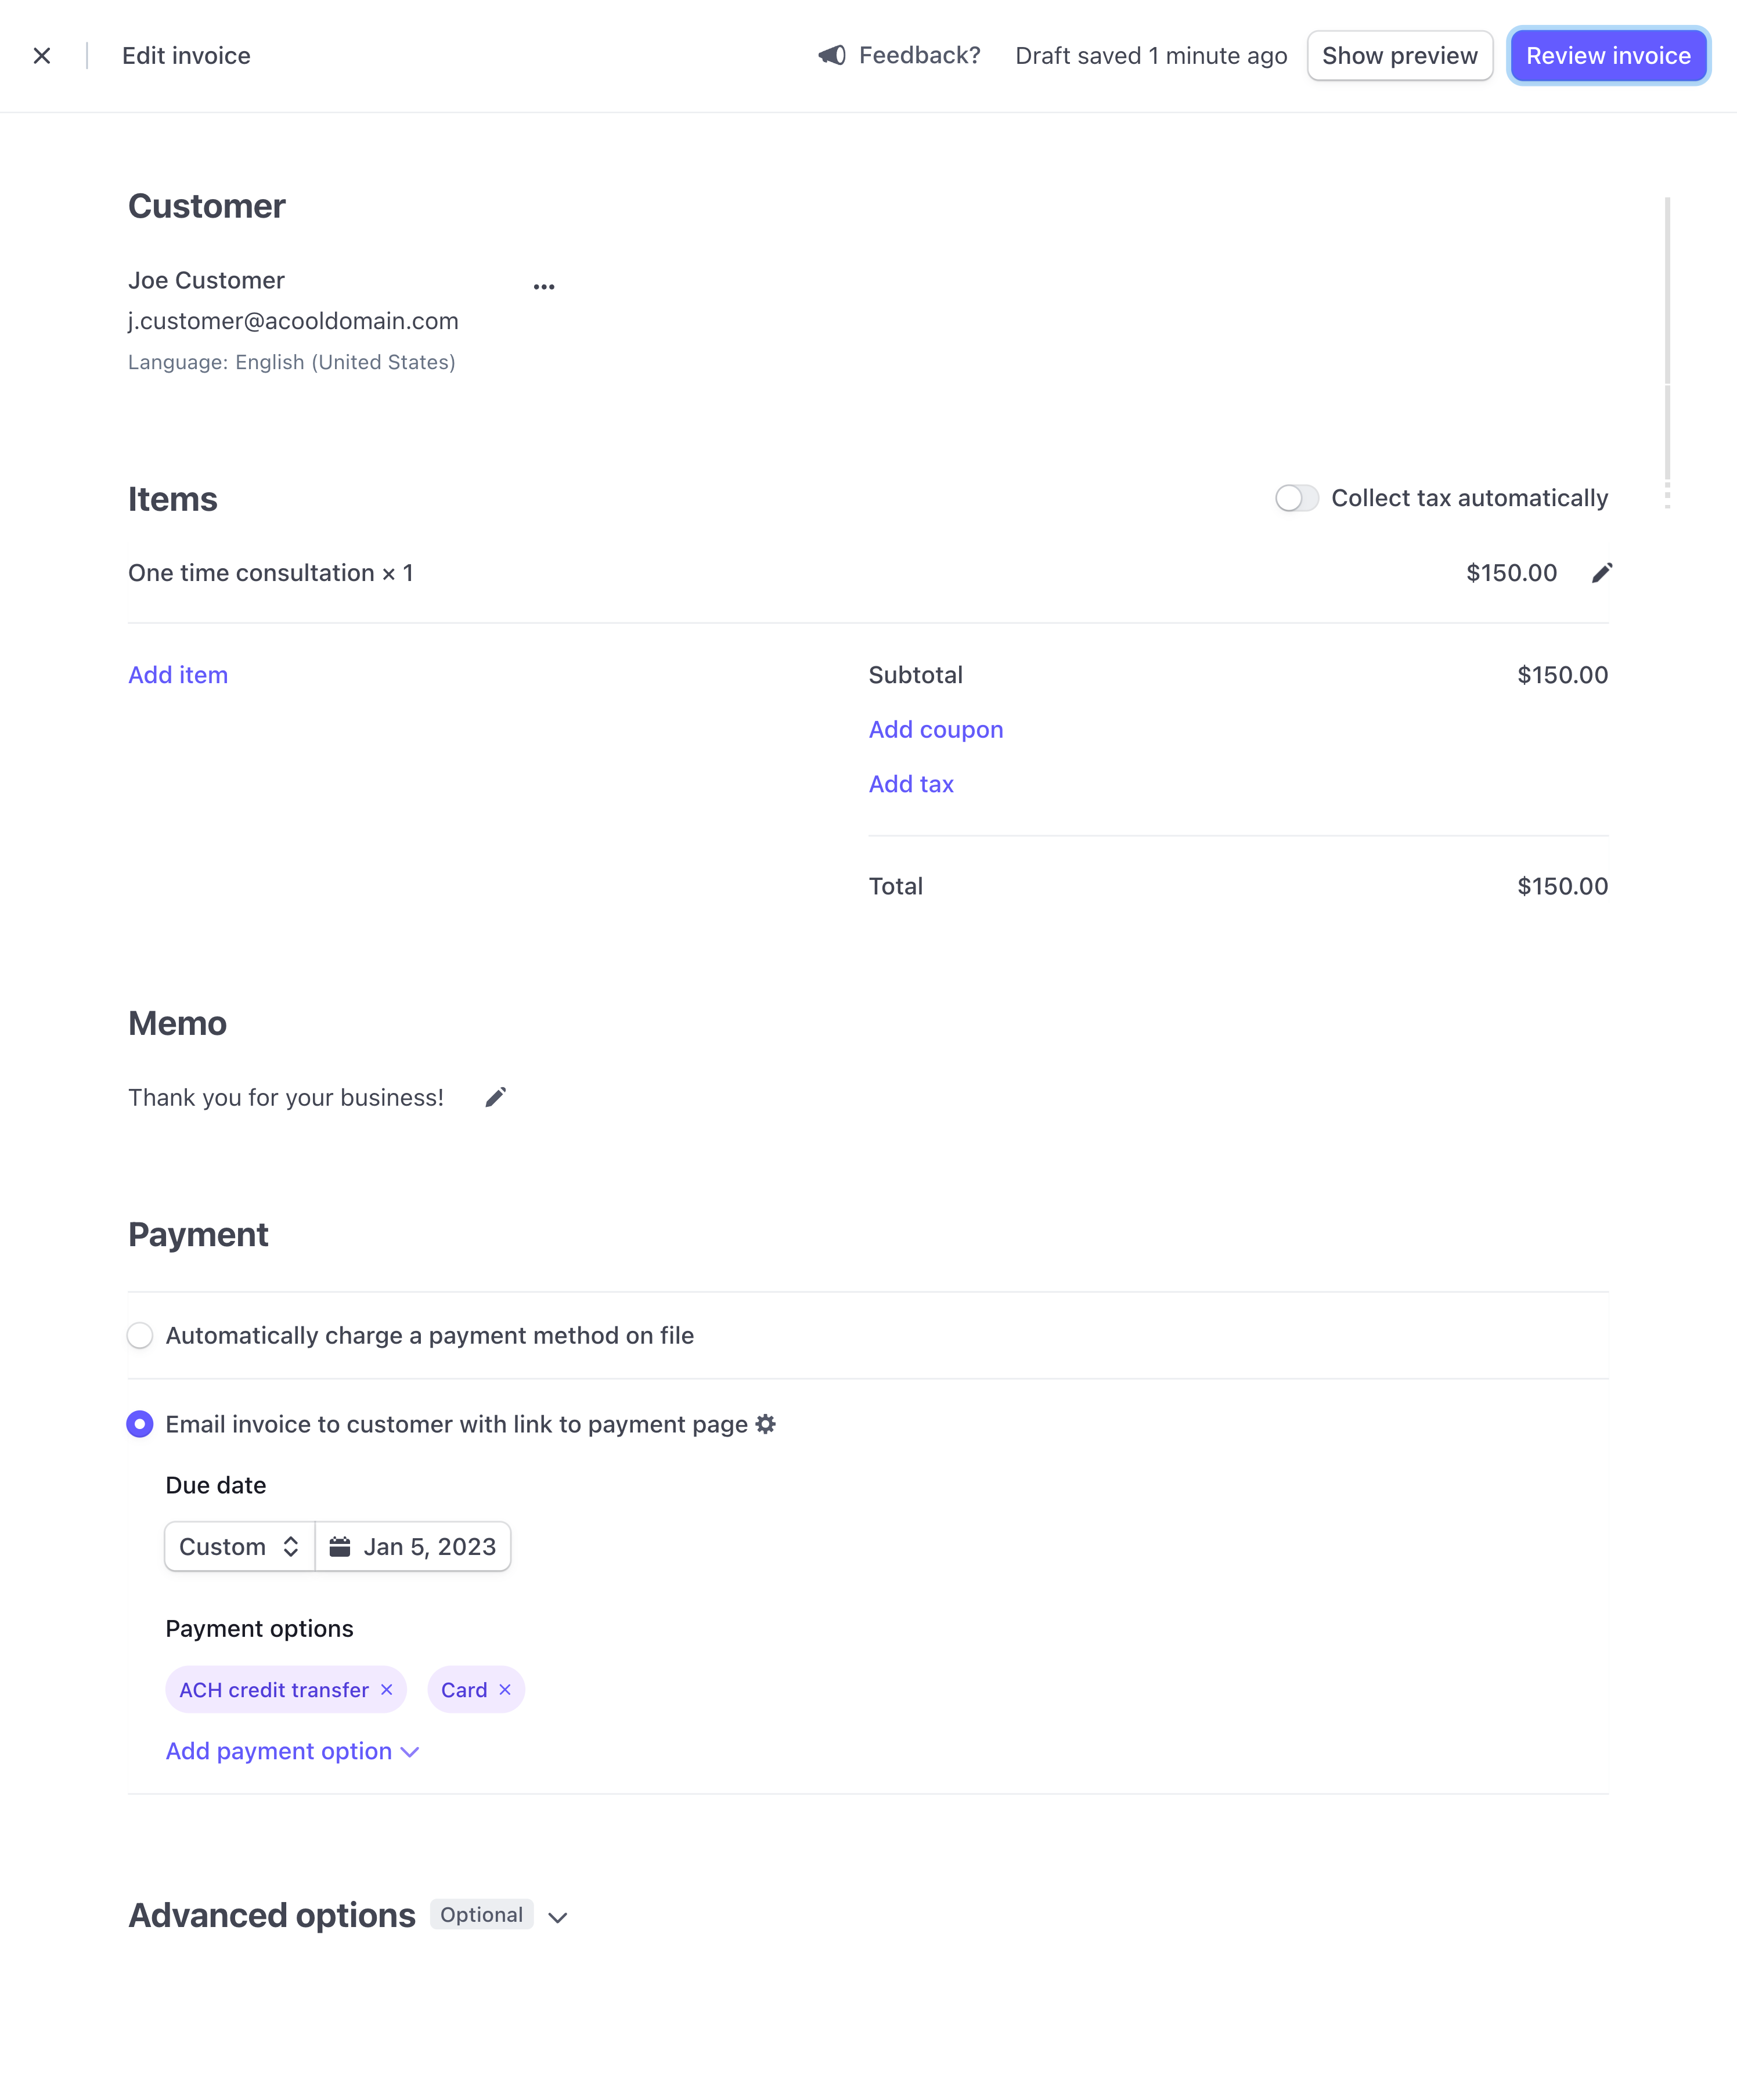
- Enter an item description and price.
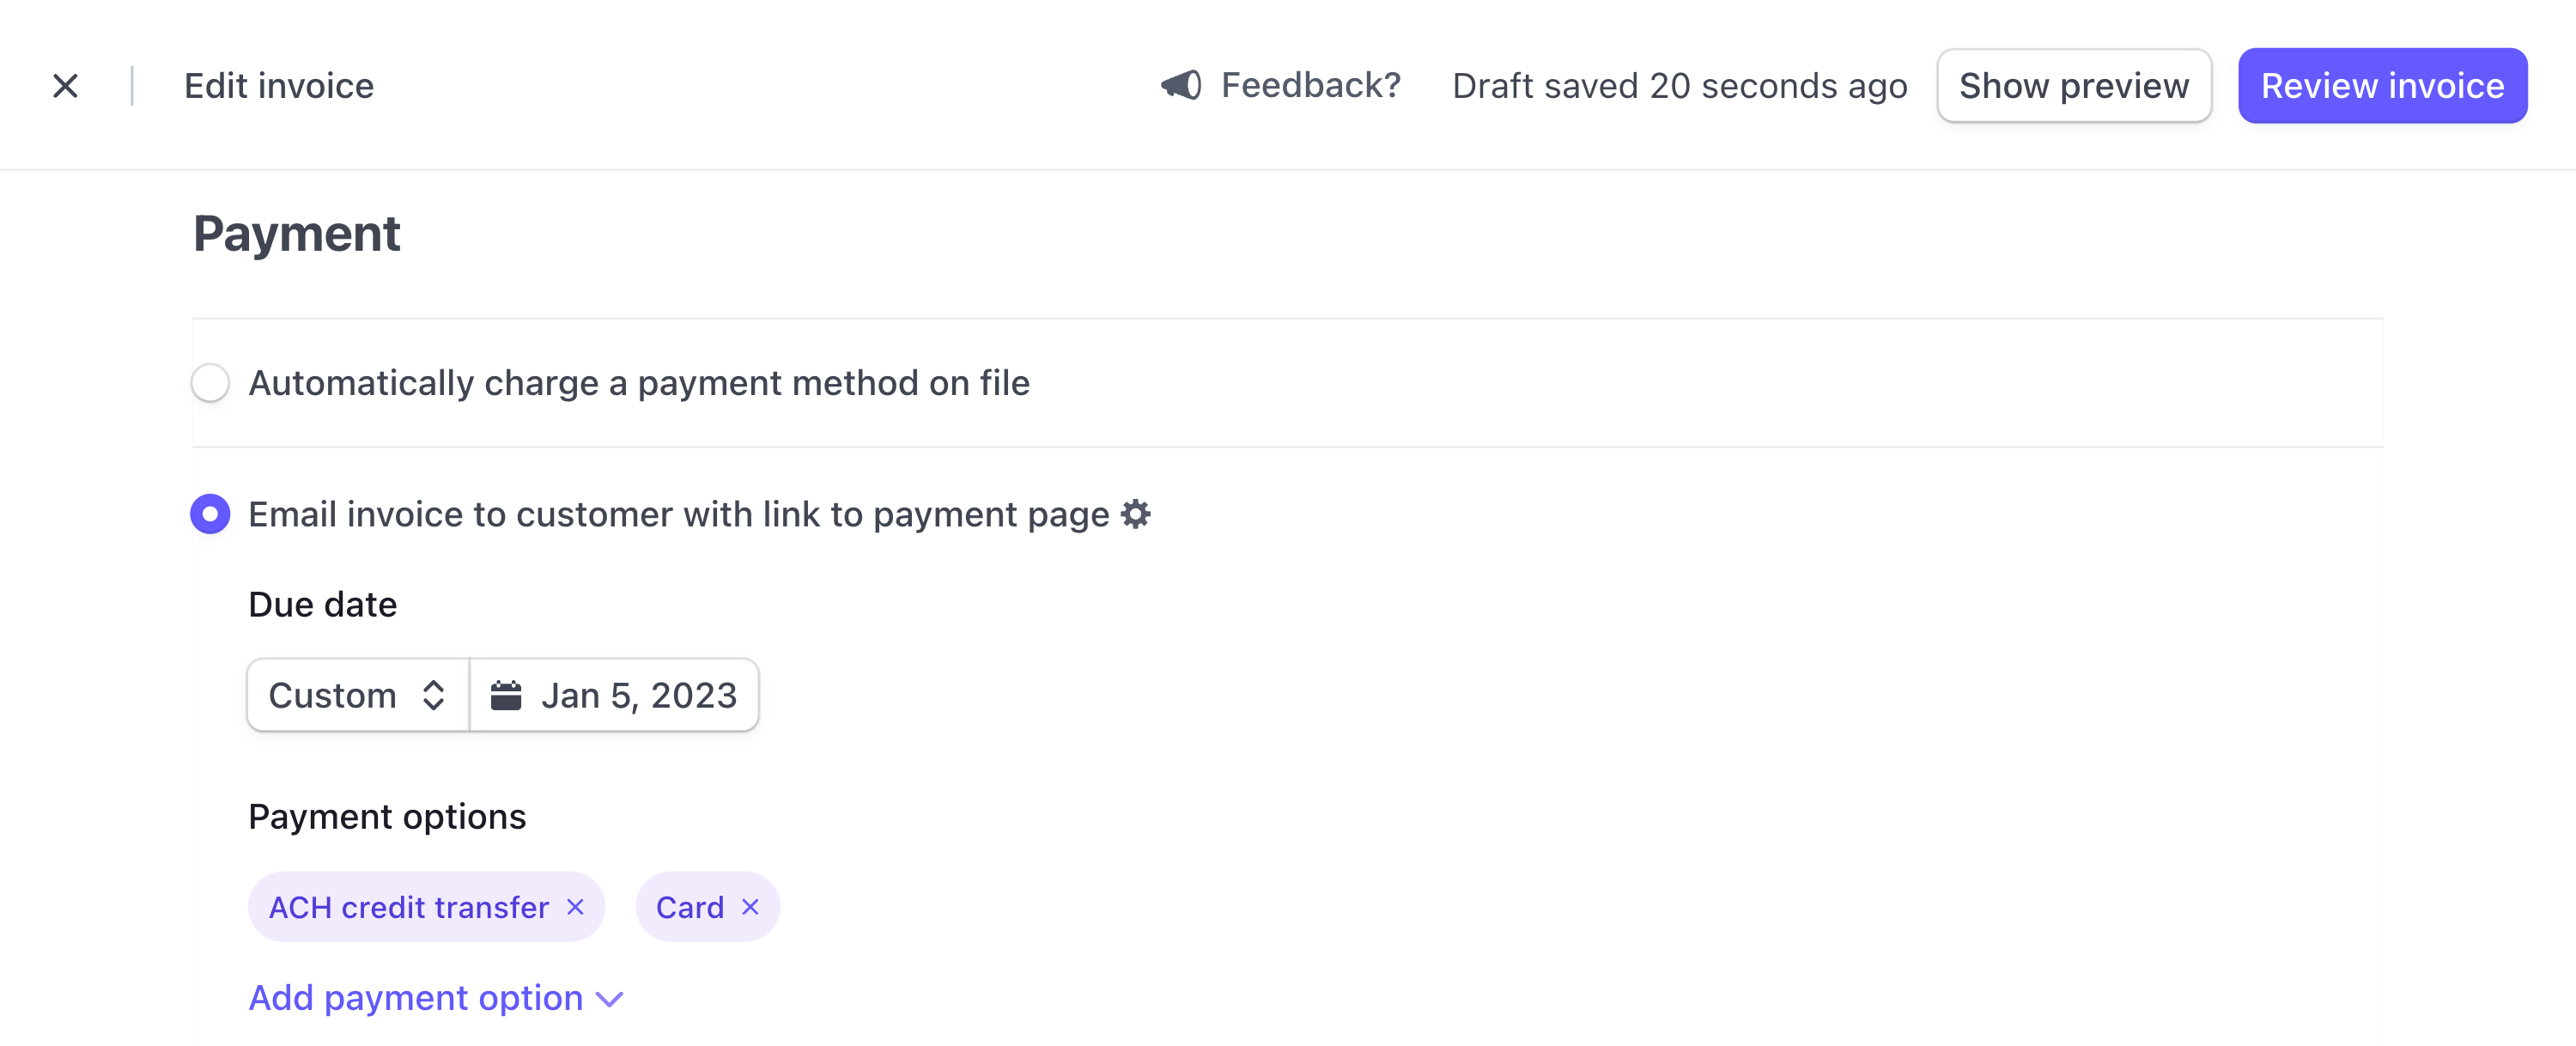
- Choose your payment method(s).
- Verify the email address in Customer field and then click Review invoice.
- Once you’ve reviewed the invoice, click Send invoice.
About Payment Methods
Collecting payments for one-off invoices is commonly done by sending an email to customers. The emails include a link to a payment page hosted by Stripe where customers can enter their payment details.
You can also choose to automatically charge a payment method on file. This means Stripe automatically charges the customer’s existing payment method. If the charge fails, Stripe automatically retries the payment.
Still have questions? We’re here to help!
Last Modified: