
How to Integrate with SeedProd Buttons & Pricing Tables
In This Document
This document will show you how to get SeedProd’s pricing table or single buttons to work together with WP Simple Pay’s Onsite Overlay forms and Offsite Stripe Checkout pages.
Prepare Your WP Simple Pay Forms + Retrieve Shortcodes For Use
To complete this walkthrough, you need to have your payment forms already created. We also assume you have your SeedProd button or pricing table ready.
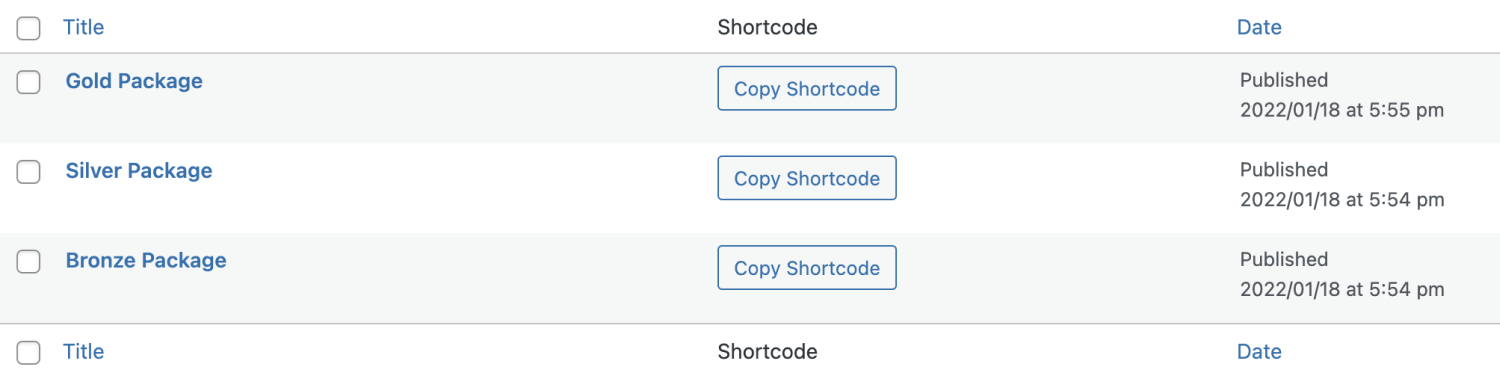
To complete this setup, you will need to copy the form’s shortcode from the WP Simple Pay → Payment Forms admin.
In the SeedProd → Landing Pages menu, select the page with the pricing table/button you want to work with, which will load the drag and drop editor
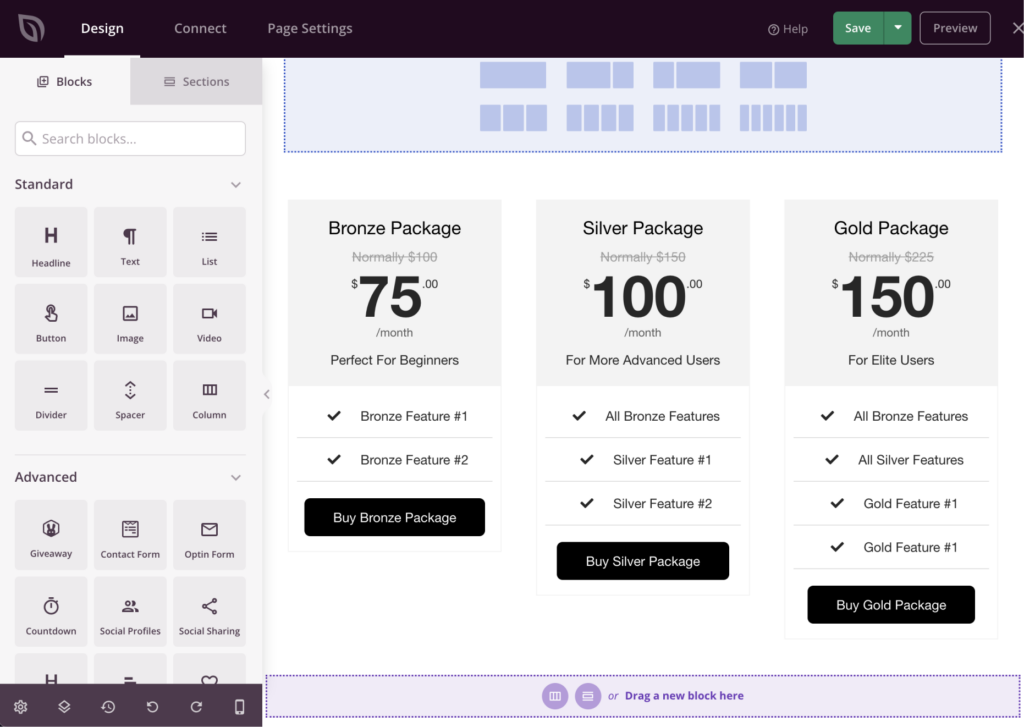
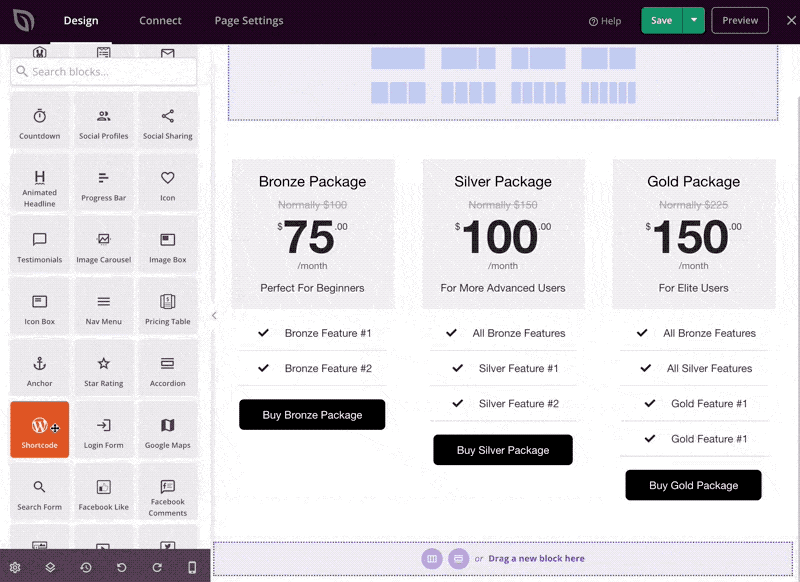
Next, add a Shortcode Block underneath each pricing table button. Here we’ll be working with the “Buy Silver Package” button. Locate the Shortcode Block in the left-hand listing, and drag it below the appropriate button and drop it in place.
Click the Enter Your Shortcode text in the orange highlighted area that has been created. This will open up the Shortcode Block editor.
The Shortcode text area will be blank at first. Now simply paste the shortcode that you copied at the beginning of this article. Your shortcode will most likely contain a different ID number than the one shown here.
You will then want to copy and paste the following code into a new line below the shortcode:
<script>
( function( $ ) {
var ids = [ '24' ];

// Do not modify.
ids.forEach( function( id ) { $( 'a[href~="#form-' + id + '"]' ).click( function( e ) { e.preventDefault(); $( '.simpay-form-' + id + ' .simpay-payment-btn' ).click(); $( '#simpay-modal-control-' + id ).click(); }); });
})( jQuery );
</script>
<style>
.simpay-form-wrap { display: none; }
</style>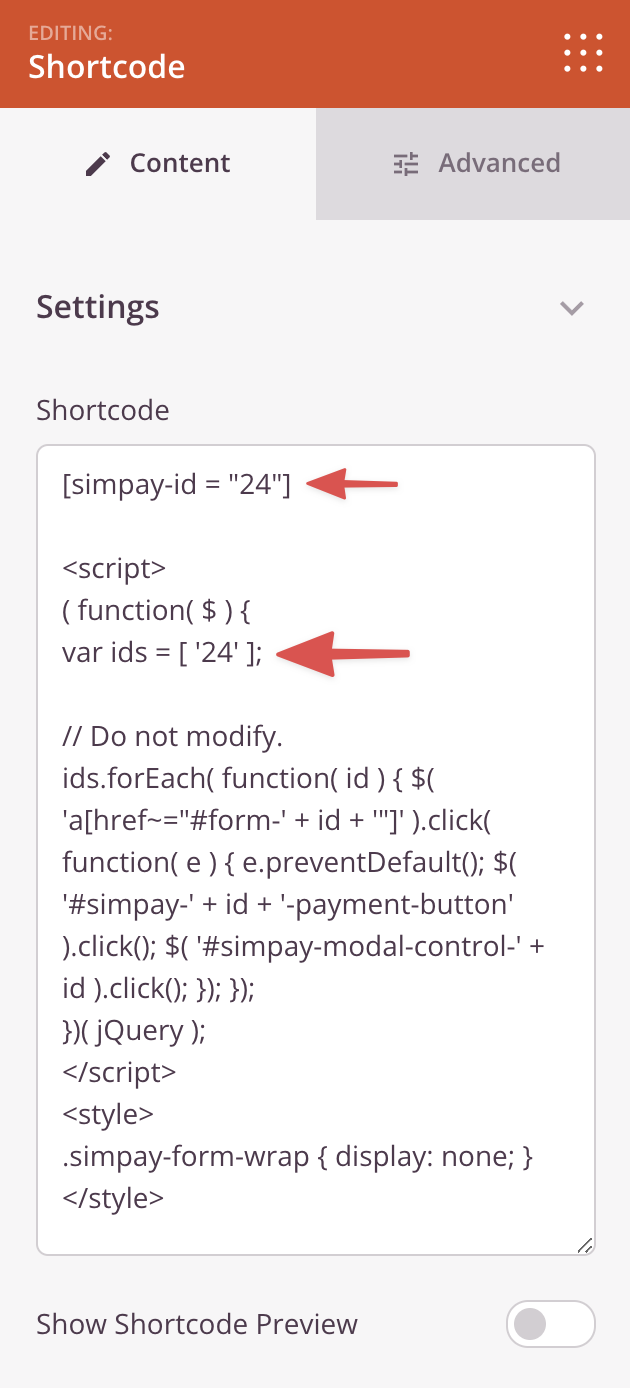
Only one more step and you’re done!
Click the pricing table button you want to work with; in this example, the “Buy Silver Package” button – which will open up the settings panel for that button.
Enter #form-24 in the Button Link field. In the example below, you would replace 24 with the ID of your form.
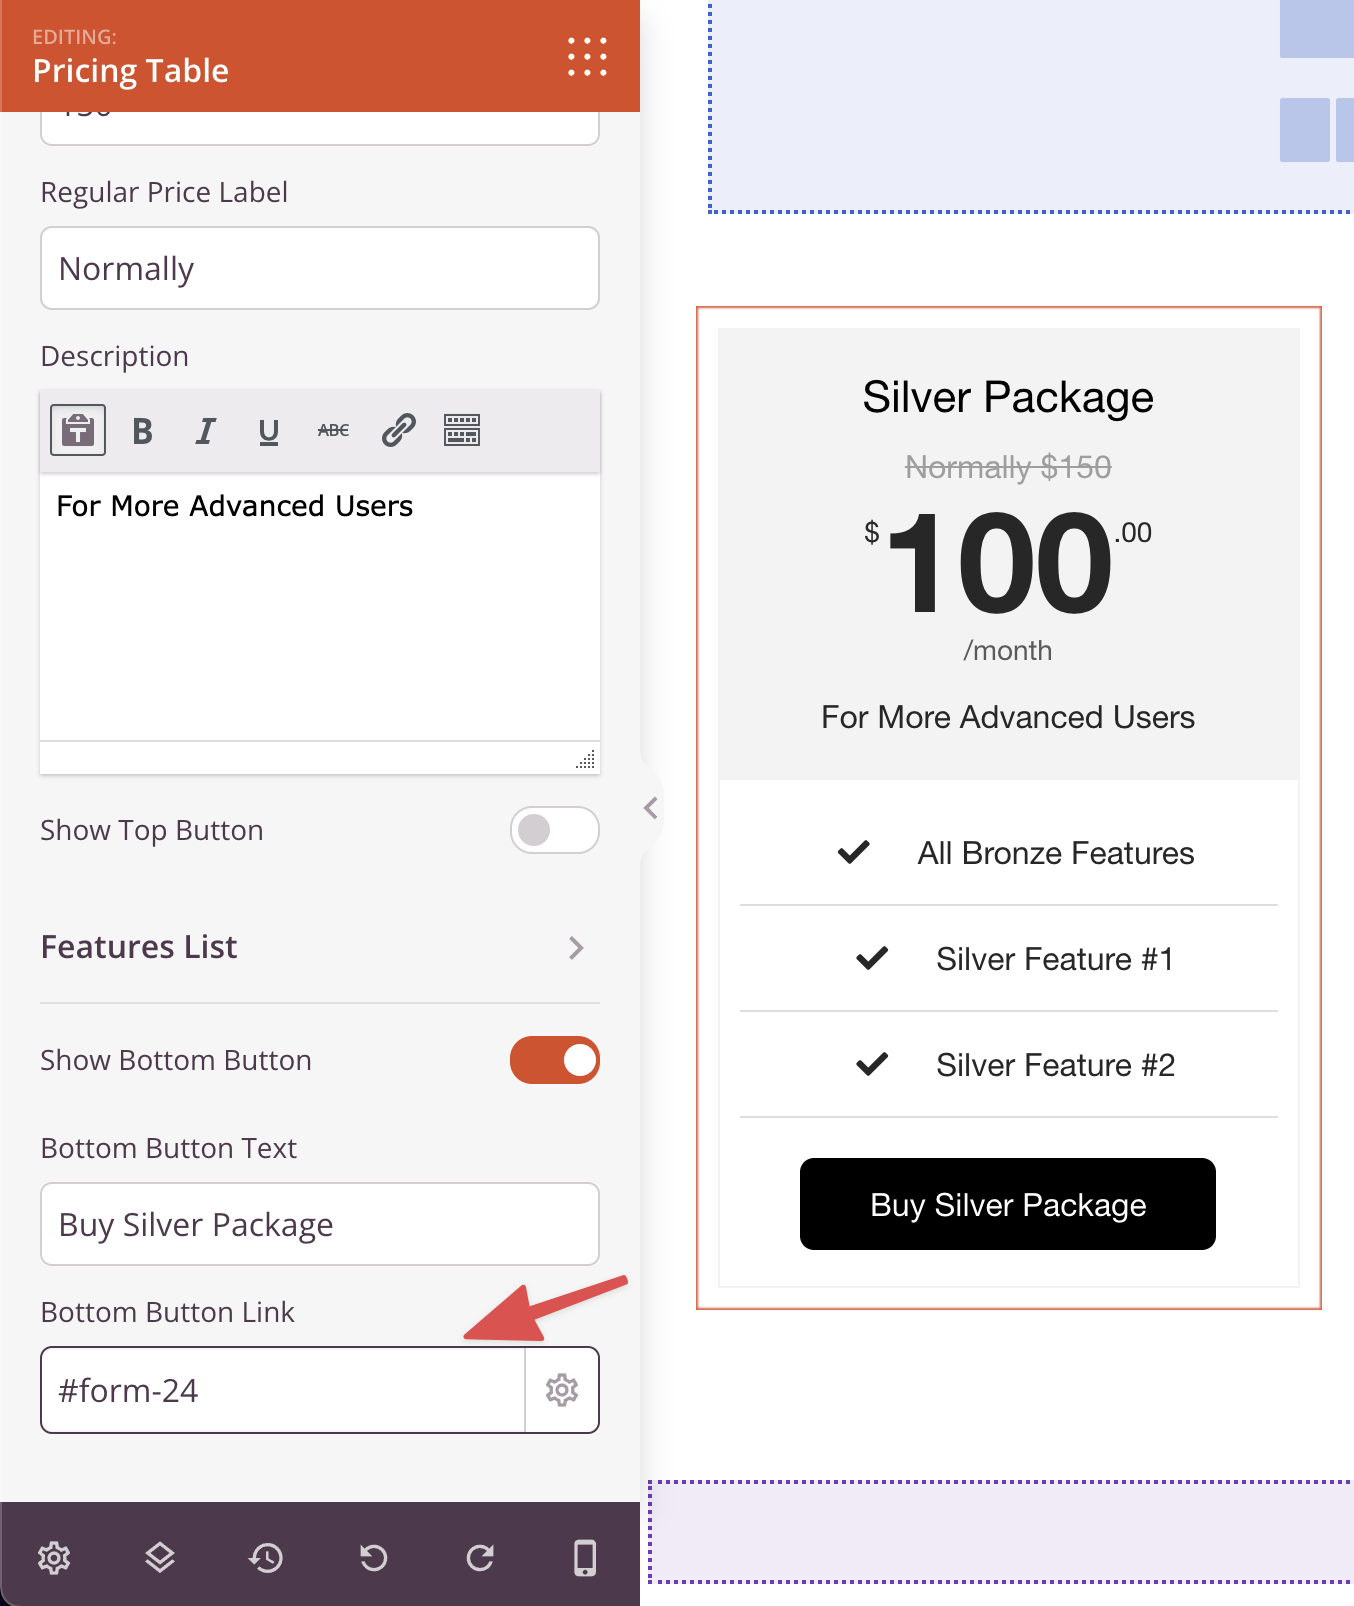
Once complete, click the big green Save button in the upper right-hand corner.

When you have repeated the process above for each pricing table button, you can click the down arrow to the right of Save and choose Publish. Your Pricing table is now live.
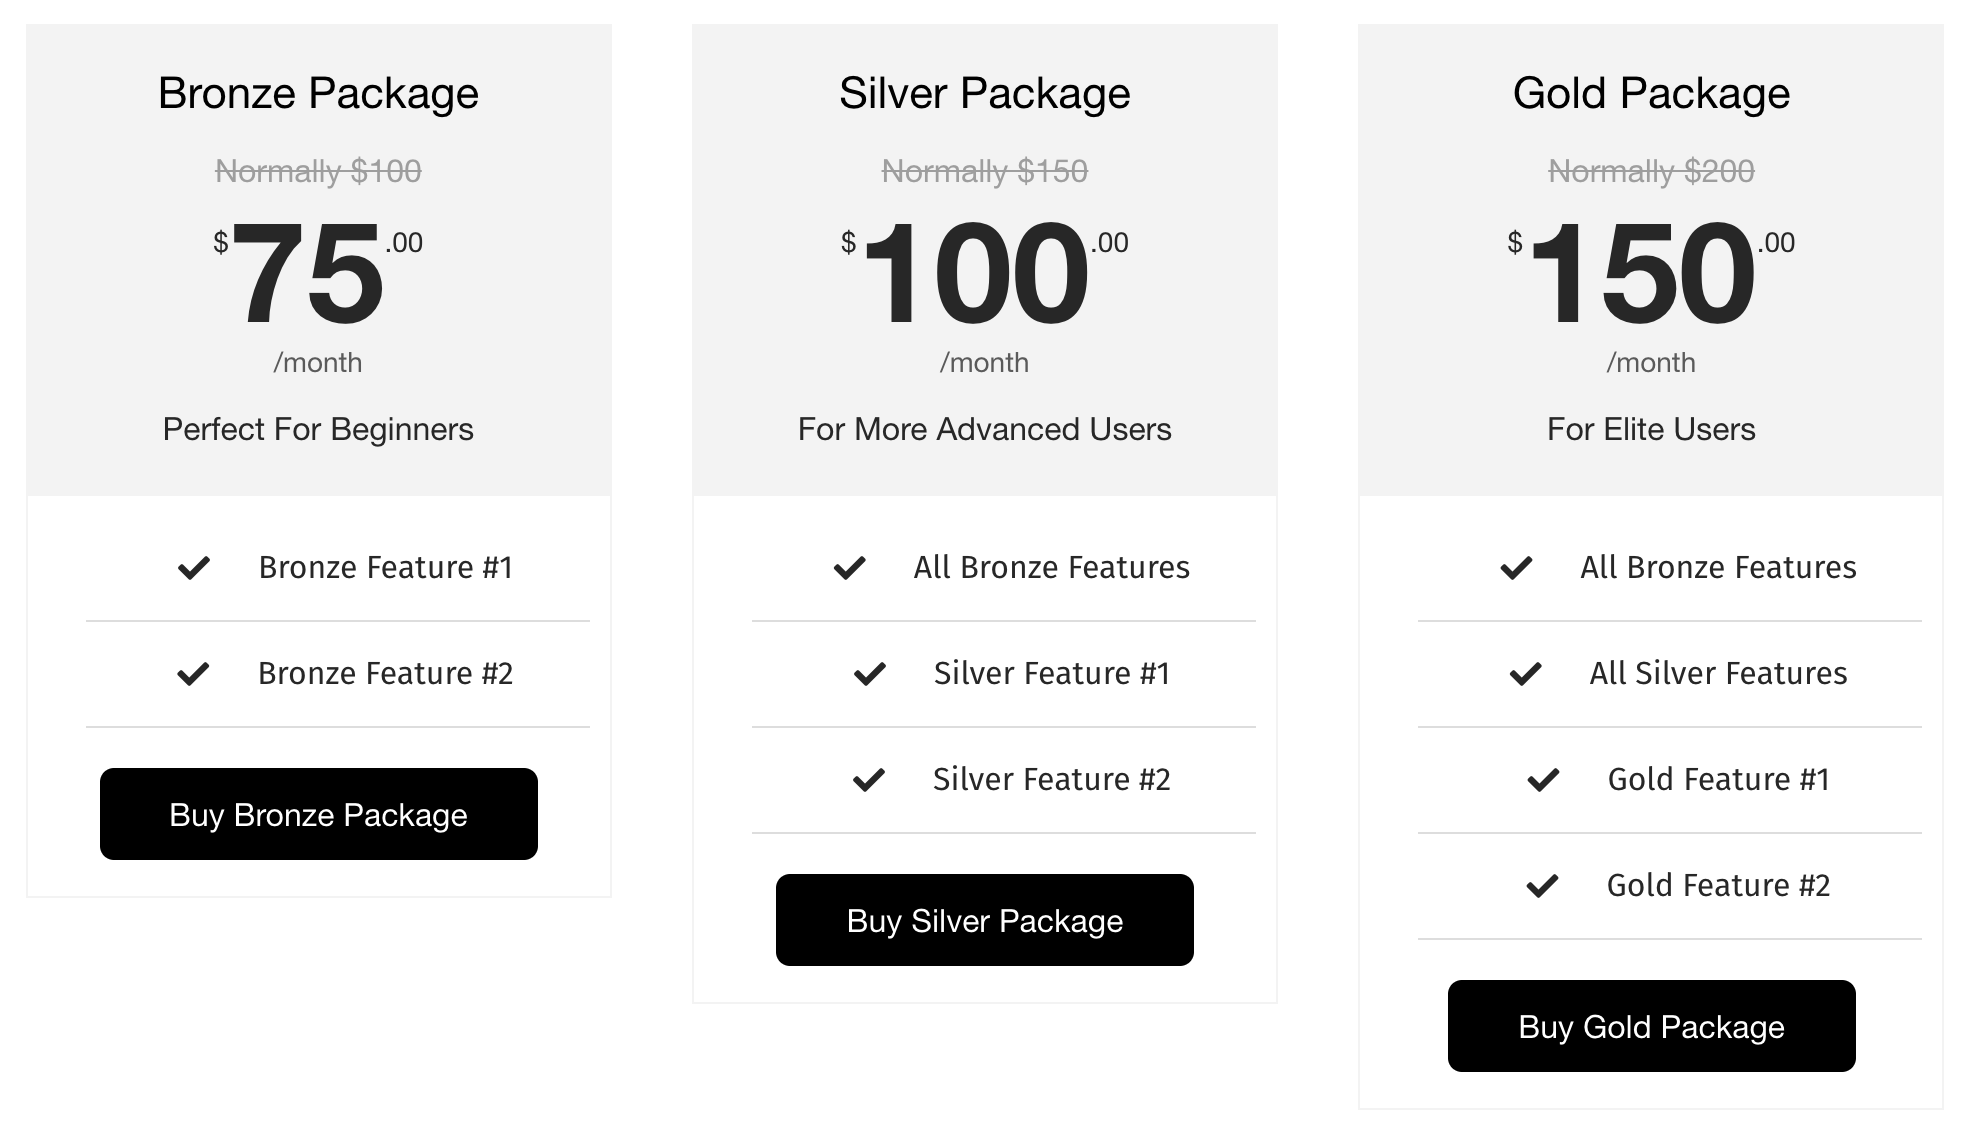
Your buttons are are set to launch your WP Simple Pay forms.
Still have questions? We’re here to help!
Last Modified: